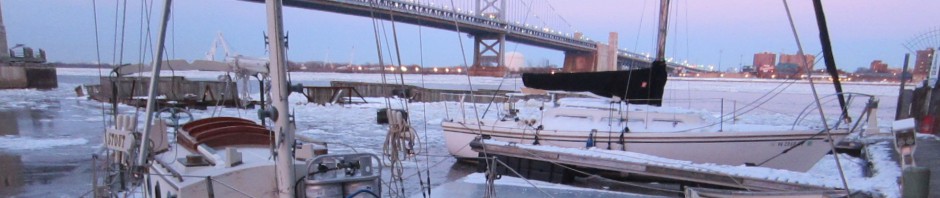
Hello world! We are going to do a major project documentation session today. Basically, Kasy did a bunch of projects with a little help from me, that we never wrote about. You see, until very recently, the boat situation has looked like this:


You may notice that the hull is encapsulated in ice and the boat is not capable of moving. And then there was that time when the force of floating ice blocks in the river caused the breakwater at the marina to snap in half and float towards the boat at breakneck speed. Kasy and neighbors ceased to be normal humans, became the cast of Crouching Tiger Hidden Dragon, and the breakwater was fended off. Moving the boat to a different slip involved Kasy and Alec smashing through the ice with steel I-beams to clear a path for the boat. So you can imagine we have been a little distracted.
On the left, the spot where Stout used to be, and the breakwater floating freely in the distance. On the right, Stout being moved incrementally through the ice.


So the view still looked like this, but we were just happy the boat was not crushed and we could still look out the portholes (and make SEITAN!)


Only a couple more extraneous things to say before I get to the meat and potatoes. There are some additions to the boat. On the left, you see a plant in one of the portholes. I got this little plant for Kasy in November, and it’s grown bigger than we ever thought a succulent could grow in a tiny pot, so I thought it deserved a place on the Internet. On the right, you see the improved galley with our new stainless steel french press! This thing is so cool and awesome and we love it.


So, project #1: DINGHY OARS.
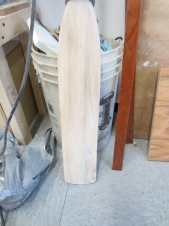
Damn, these oars were a mess! Peeling varnish, rotten spots, splinters. And there was a big split in the paddle of one of the oars. So first we took turns scraping and sanding off all the old varnish and chiseling out the rotten sections of wood.

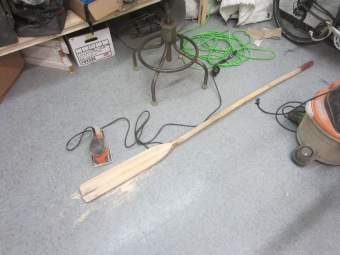
To fix the split in the oar, I sanded down both sides of the paddle until the surfaces were even, chiseled out the rotten wood inside the crack, and cut out a small piece of wood that would fit inside the crack. I then used 2-part epoxy to glue in that piece and clamped the whole thing together until the epoxy set. I also filled in other holes and cracks with epoxy. When the epoxy dried I sanded the paddle smooth again.

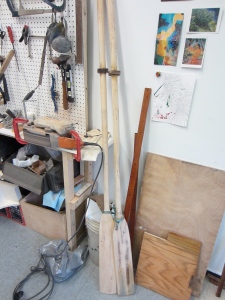
After epoxy, we put several layers of white paint on these bad boys.

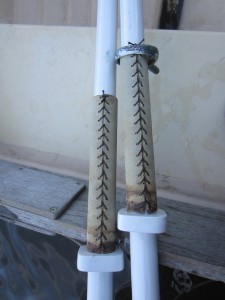
After paint, Kasy sewed leather grips onto the oar handles, using a very impressive herringbone stitch. See the picture below on the left. In this picture you can also see the handmade stoppers Kasy made (the rounded square pieces right underneath the leather bits.) The purpose of those is to keep the oarlocks from sliding off the oar.
Project #2: WINCH COVERS!
The goal was to remake all of the old winch covers using new dark green canvas. This series of pictures shows how Kasy reverse-engineered the winch covers. Below is the old winch cover, right-side out and inside-out.


Kasy ripped all the seams apart to isolate the original pattern pieces of the winch cover.


Then he copied the pattern to cut the pieces for all the new winch covers.


And then he sewed together the new covers! On the right you can see all the various winch covers in different steps of completion.


Project #4: SAIL BAGS
Oh boy has this been a project! There are not nearly enough pictures of it. Hopefully we will add more later. Like the winch covers, we wanted to remake the sail bags with new canvas and eliminate the zipper closure that the old sail bags had. So Kasy made some patterns, you can see some of that process here:


And also he made toggle closures instead of zippers! So much cooler.

To finish it off, he took some extra nylon and some D-rings and made these super strong ends where the bags will be clipped to the boat. More pictures to come…. we still have a little work to do on these. And we’ll put pictures up when they finally get on the boat!


Project #5: Battery Shelf
A few months ago we acquired new batteries, which we plan to use with solar panels. Right now the boat’s batteries are kept in the lazarette, which makes them more suceptible to getting wet. So Kasy wanted to make a battery shelf that could be bolted to a bulkhead inside the boat. And thus, a pile of wood was transformed into a beautiful shelf.


The two batteries will sit on either side of the shelf, which will be bolted to the inside of the boat. Here is the shelf , seen from the front and from the back.


Project #6: Switchboard switcheroo
So, with solar panels and new batteries comes a battery monitor. Of course the battery monitor needed a special place (because everything has a special place on Stout). So you see the switchboard in the picture below on the left? This controls all of the boat’s electronics. Kasy disconnected all the wires from it, and since not all of the switches were being used, he condensed the wires so that they all connect to the upper right section of the switchboard. Then he cut out the bottom left side to use for the battery monitor.
In the right-hand picture below, you can see the battery monitor sitting on the left, and the piece of the switchboard Kasy cut out on the right.


The switchboard is just a thin aluminum plate, so Kasy was able to easily cut out a square in the switchboard to fit the back of the battery monitor. Here it is, looking snug as a bug in a rug.


Project #7: Galley makeover
The galley is great, but things could always be better, you know? So in the “before” picture, below on the left, you see that there are plates loosely hanging out in that shelf. You also see that in the corner there is a partially hidden random assortment of kitchen accessories. They are stuck in a board with several holes in it but they are sort of hard to remove from that corner.
So, innovations: first Kasy had the idea of mounting the plates to the outside of their shelf. This would open up the space of that shelf. I was skeptical, but as you will see, it worked out. Second, we wanted to move the other shelf to the left a little bit, to make more room in the corner for something. We decided to make a new corner accessory that would hold both cups and kitchen tools.

So first we pulled off that first shelf, brought it to the studio and gave it a makeover. Kasy added an extra layer inside the shelf to make it slightly wider. He also re-varnished it and glued it back together.

Then he made 4 little U-shaped pieces, seen below, that each have a lip on them to hold the stack of plates in place. These were attached to the front of the shelf.


Next, after moving the second shelf over, Kasy made the corner piece. First he measured the wood piece and decided where it would fit in. Then he cut out several holes, meant to fit 8-0z stainless steel cups, a pot grabber, mixing spoon, etc.

After several layers of varnish, here are the pieces fully installed!

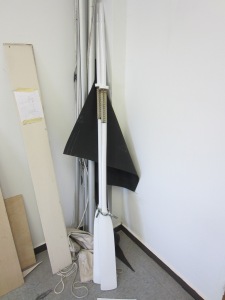
Project #8: Dinghy mast bag
The goal here was to make a bag for the dinghy mast, which is a large and seldom-used item on the boat. It usually sits tied up to one of the cables on deck. But it needed a new bag, of course! So Kasy made a sweet one.
It’s another project that we forgot to take pictures of as it was being made, mostly because Kasy made it too fast for anyone to keep track. But the coolest part is the leather bottom, which has a grommet hammered into it for water drainage. It’s a small accent but I think it makes the whole thing look very professional.


Other things that are awesome about this bag: the snaps are hidden by an extra flap sewn onto the outside. And also, there is a wraparound handle made out of nylon webbing.

A man and his bag.


Sweet, we’re done catching up for now! Thanks for bearing with me for all this time. I have a few boat projects that are almost done, which you’ll hear about shortly. Here is another cool plant picture, and a picture of my bike next to an awesome mural, for shits and gigs.


I am COMPLETELY obsessed with you two, with your writing, with Stout, with your bikes and your canvas and leather and wood and metal and tools and coffee and smiles and your succulent. So excited to follow this blog/y’all. I can’t wait!